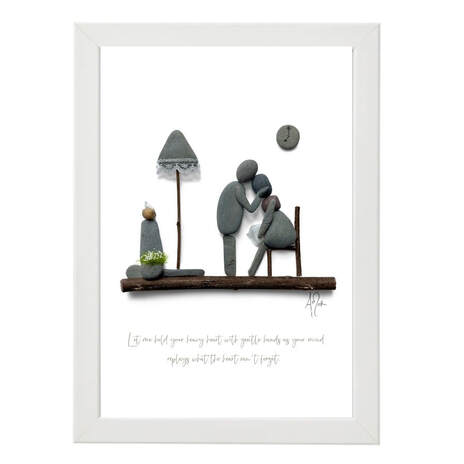
 'Let Me Hold Your Heavy Heart With Gentle Hands As Your Mind Replays What The Heart Can't Forget'.edit. Let me tell you a little about this design. This is a long one so you might want to grab a cuppa. I had this idea building inside me for a very long time. It started not long after I launched the prints of my pebble art. Thousands of people got a free piece of my art and 99.9999% of people adored and appreciated the effort that went in to creating such a valuable offer to make getting a piece of my art more affordable for everyone. And it filled my heart with so much joy. BUT... There were a couple of people who wanted to skin me alive and abuse me over the online space. For the sake of this email lets just call them Prick One and Prick Two. Prick One - Called me all the names of the day and how much of a scammer I was because I sent a print with no pebbles on it. Even though it says 'print' on my offer page over 10 times, includes the type of ink I used in each print description and in the FAQs states that its not actual pebbles its a PRINT! But because they didn't read it properly it was my fault. I'm just glad prints are prints cos I just bought a lion print off a fellow artist... maybe I should ask where my real lion is! lol Prick Two - Felt it was ok to bully me online because they were an artist too and by giving away my prints for free was cheapening every other artists work. Ugh. If they had approached me differently I may have taken the time to explain that by giving away some of my art it was my hope that it created a relationship with people who already enjoyed my work so that when they had a gift to buy or they were in a better position to purchase some art from me that they would support me down the line. I remember crying to Mr AMor numerous times as my mind kept replaying what these two pricks thought it was ok to say to me even though there were 1000s of happy customers I couldn't let these peoples words go. I doubted myself and I thought I had failed and let people down. This was probably the hardest time I've had to go through in my biz. I stopped working, I stopped creating and I stopped putting my work out for the longest time as I was so scared. Mr AMor encouraged me daily that their words were just a reflection of their own inadequacies but it took so long for me to start believing it. I loved making my pebble art and seeing the joy it brings to people so one day I picked up my pebbles and let the flood gates open. I literally cried my way through making this entire picture and it was one of the most healing things that I have ever experienced. It was like a transition of all the hurt I was holding internally onto the pebbles in front of me. I released the hurt in my heart and my mind quietened of the mind monkey chatter that was on repeat. It has been a trying time to get going again but I have never forgot the gentle hands that held and helped me through it. When people get this print I always get feedback of what an emotional powerful piece this is when they get it in their hands. They burst into healing tears remembering a loved one that has passed, a miscarriage, an estranged family member, an illness or mental burden that they just cant stop replaying in their head and as soon as they see it there is an instant release. I encourage you to get your hands on this piece and layer your tears on it to heal whatever you are going through right now. It's time to stop that repeating chatter that you could have done better, should have done ...etc let your heart let go of the pain you're holding and remember the loved ones and support you have to hold you with gentle hands to help you through it. I SEE YOU. You will get through this trying time too, every storm eventually runs out of rain as Pastor Furnick says. If you would like to experience the I SEE YOU print you can get one below or if you know someone who needs this buy one for them too! I would love to hear your experience too, even if it's a pic of your tears on this print you can comment below or send me an email [email protected] and I will get right back to you. Take care of yourself,  PS. If you would like to show me some love and encouragement I would be so grateful for you to leave a review of my work here.
1 Comment
It’s beginning to look a lot like Christmas… every store is brimming with Christmas gifts and cards. But, as you drag yourself from store to bustling store, scouring the shelves, searching for the perfect present, the shopping experience becomes more and more overwhelming. You just can’t seem to find anything ‘right’. Discouraged, lots of us then take to shopping online. But all we’ve really done is swap walking up and down aisles aimlessly for scrolling up and down webpages hopelessly. We keep dreaming the perfect gift will just jump off the page at us. It’s not just a Christmas problem either! Throughout the year, no matter what occasion, we never seem to know quite what to buy everyone. Then there’s a whole other problem – recognising the perfect gift as just that – the perfect gift. What if, in all your exhaustion, you just scrolled right on past it? Or in the store, surrounded by bunting and lights, you can’t process all the individual items they are selling and miss it? After it all, the only thing you’ve done is get your step count completed for the day successfully! Ultimately, it’s all because you don’t really know what you’re looking for. But, what if I told you there’s a better way to find the perfect gift? Well, just keep reading, because I’m going to give you all my top tips and tricks for successful gift shopping!  The first thing you need to know is how to shop the right way. You’re aiming to find gifts that make the recipient feel like they have been picked specifically for them and will light up their face with a smile. The way to do this is to remember this one thing: It’s not about what you like – it’s all about them. We are all such different people that it’s important to focus your search on what makes them unique and not just on what you like. Be thoughtful and personal in your shopping instead of just panicking last minute and having to buy something in a rush or buying subconsciously for yourself. So, how do you do this successfully? The trick is to ask the right questions. You’ll be happy to know I’ve made a list of them below for you! Simply ask yourself these questions before you begin shopping and you’ll be on your way to choosing the perfect gift! The first question to ask yourself is: What do they love? This is an important question to start with because it will help you focus on the recipient as an individual. Think about if they have a special interest you can use as inspiration. Hobbies are a great place to start to think of gift ideas. A framed picture of their favourite hobby, like our golf design for instance, is an amazing way to show them you are thinking of what they love. 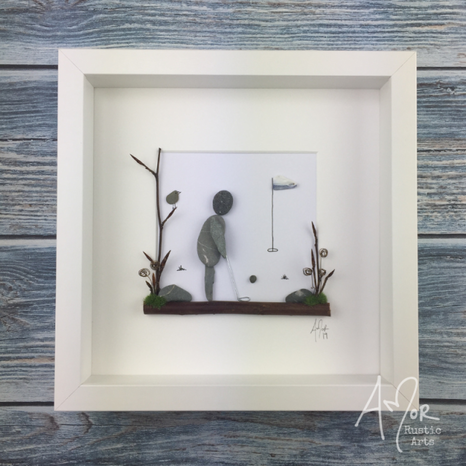 Next consider: What is their aesthetic or style? If you’re familiar with their home think about the style they like to project. Do they have a rustic theme in their home? Do they have a farmhouse kitchen? Then, perhaps, consider something like this cottage design. Or think about their clothing style or what they are drawn to and pick up if you have been shopping with them. 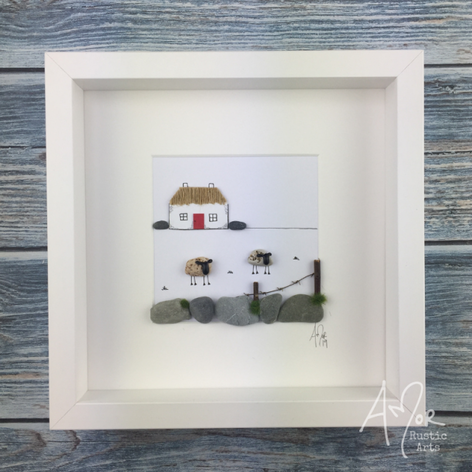 It’s also important to think: Have they any health problems or allergies? You need to make sure they will be able to make use of what you buy them. If in doubt, here are some things you may want to avoid: bath or shower products they could be allergic to if they have sensitive skin, flowers for a hay fever sufferer, anything that contains nuts they could be allergic to, and so on. Once you have ruled all the medical issues out you need to also ask: What could they use? What do they need? These two questions are about the practicality of your present choice. Think about their lifestyle and if what you are thinking of purchasing fits with that. You don’t want to get your in-laws something crazy after all! A good idea is to think of any events coming up in their life they would need something for. For example, are they starting school, going on holiday, beginning a new job or course? Another question to think about is: Am I purchasing a present for a special event? This is great because it automatically creates new gift options! You can customise the gift by incorporating something that reflects the occasion you’re purchasing the gift for. For example, for a general birthday you could think about their birthstone colour. For a wedding anniversary gift think about including the theme associated with that anniversary, such as lace, wood, silver etc. Gifts like our pebble art are ideal for these events because they can be customised to perfectly match every occasion. 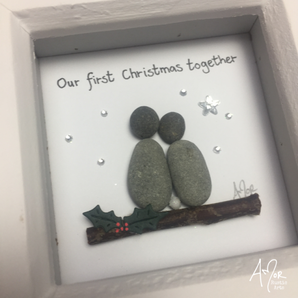 Before we go any further, there is another big question: What is my budget? The biggest piece of advice I’ll give you here is to have a budget and stick to it. Easier said than done sometimes I know! But, that’s usually because we think we need to blow our budget to get that perfect gift when, really, thoughtfulness and usefulness are much more important that spending a huge amount. A handmade gift can actually be one of the most treasured by the recipient but also cost effective. If you want to save money this Christmas season, I highly recommend our DIY kits where you can make a personalised gift on a budget. Honestly, it will mean so much more since you made it yourself! 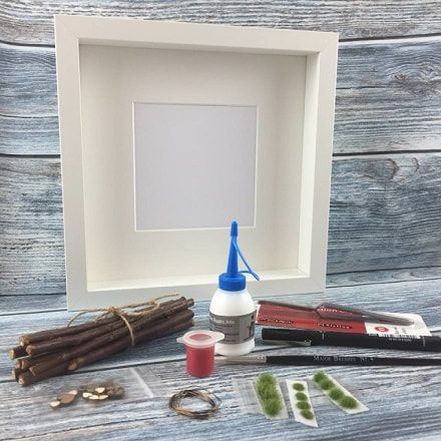 Finally, you should ask yourself: Is there something you and the recipient share that you could incorporate into your gift?
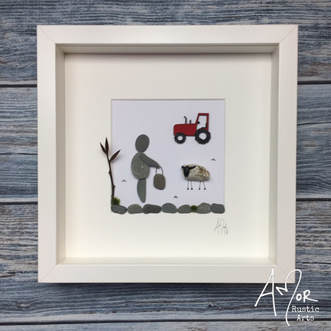
Do you have a special memory you share? Is there a certain hobby you enjoy together? Or is there something they have mentioned in conversation with you that you could take inspiration from? (It’s one of the nicest feelings to know that someone has been listening!) Again, think about a personalised gift that they will know is especially for them – and that you haven’t just passed on an unwanted gift to them! Well, that’s it – my top seven questions to ask yourself before you go gift shopping. Answering all these questions will help you focus on the finding the perfect present and, even better, over time you will become an experienced gift buyer! If you use these set of questions every time, you’ll soon find you’re having gift ideas even before you need them! You will be able to make a list of ideas so when you do need to buy a specific gift you will already have a list of ideas! Happy Shopping! It’s almost Christmas – the most wonderful and magical time of the year! Unfortunately, for lots of us, it’s also the most expensive and sometimes the most stressful! Bills pile up, while the bank account goes down. Desperation can force you to spend more because you have to get a gift before the big day or make you pay more for next day delivery (even though with Christmas chaos you’ll still be worrying if those last-minute online orders will arrive on time). You can scour scores of magazines, circling possible gift ideas for hours. Hundreds of busy bustling people - just like you - spill out of shops, searching frantically. It’s a nightmare to get through the crowds, especially while carrying bags and holding on to your children, or even worse, pushing a pram! There are queues at the shops and queues on the road too. It’s just like the song says, “Top to toe in taillights”. I’m no stranger to the Christmas craziness. I used to think there was no way to avoid the Christmas rush traffic (besides hiring some reindeer and a sleigh) but what if I told you, you can ace Christmas with one amazing and simple hack?! No more wondering what to get that relative (the one we ALL have) who has absolutely everything. No more spending hours searching for one worthwhile gift because you’ve had no inspiration (and you can’t possibly get dad socks AGAIN). If you want to save money and time, now you can. I’m going to show you how you can do both – by making your own pebble picture gifts! Why Pebble Art? Not only will creating your own pebble pictures save you a sackful, they are the perfect choice of gift for so many other reasons. Pebble art is personal, special, sophisticated, memorable, meaningful and totally unlike anything else the recipient will receive this year! With pebble art you can make individual gifts for the all the family. Capture those precious moments that you share together like sipping a hot chocolate with Grandpa at the table on winter nights. Maybe Dad just loves to be out working on the farm? How about trying something like this?
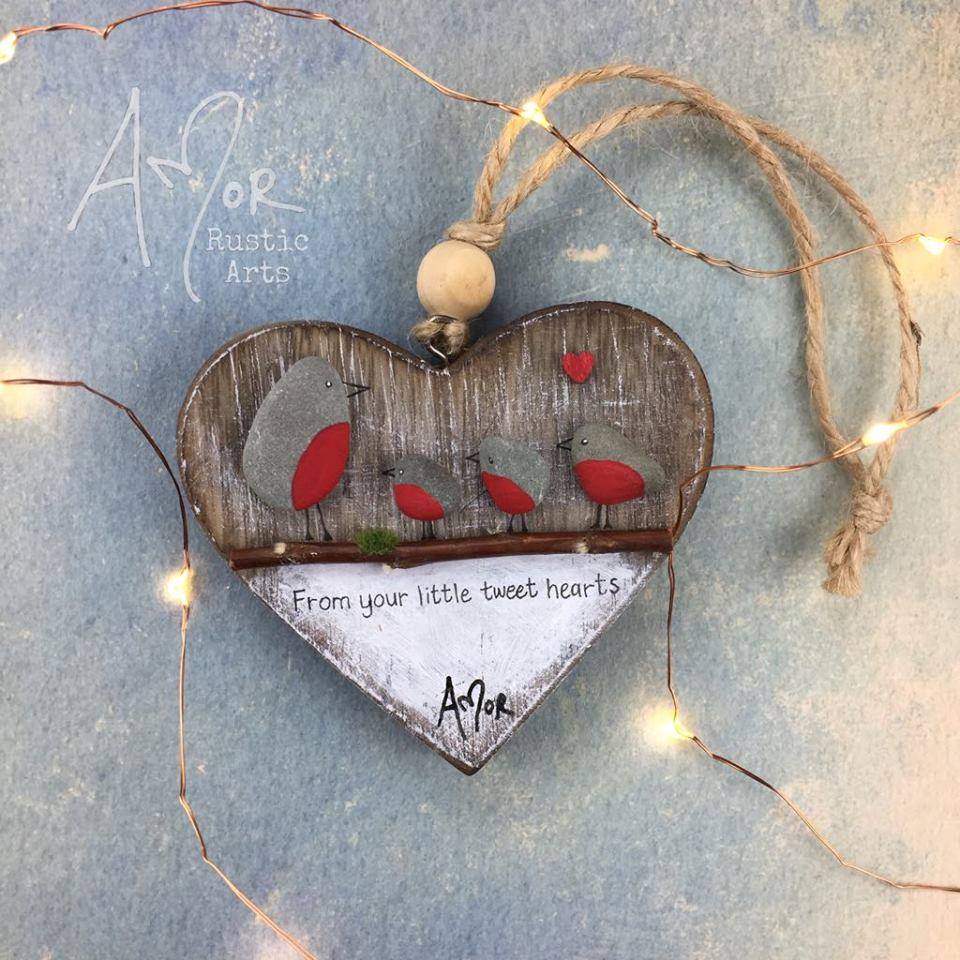
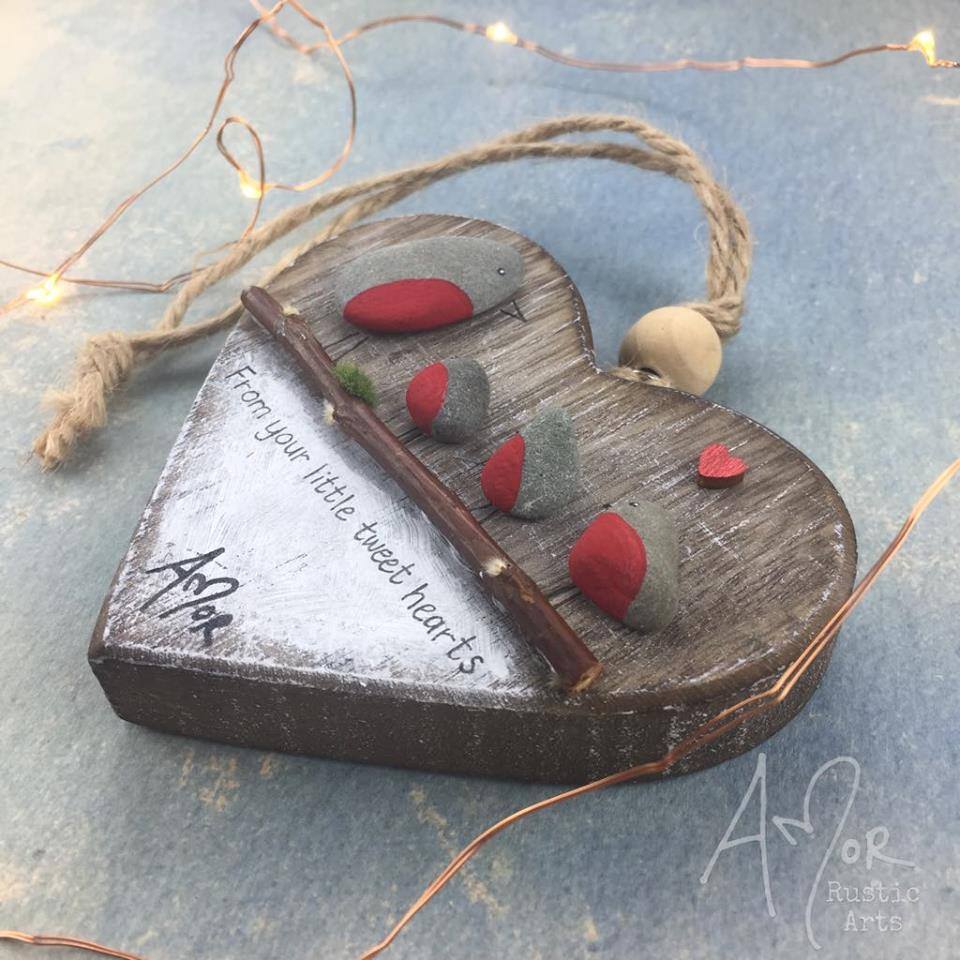
Or why not give Mum something tailor made for her that she’ll treasure forever? 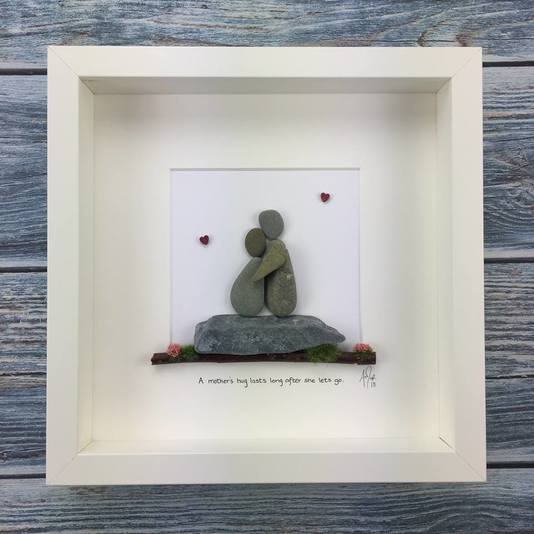 Alternatively, you can create a statement piece that includes all the family members to hang up in the home and be a keepsake just like this. 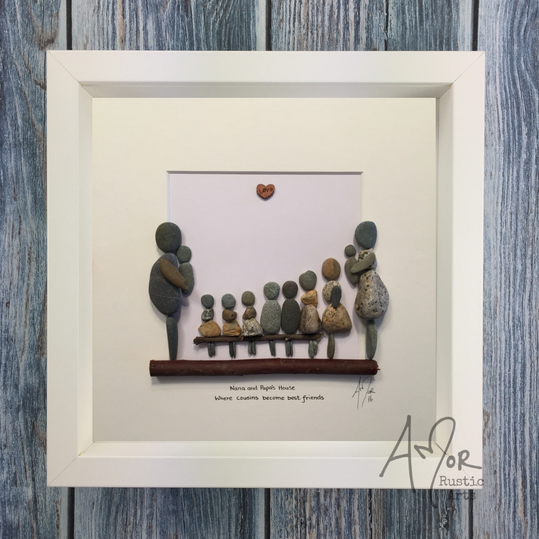 If you’re extra savvy and want to save on frames or want the perfect stocking-sized gift you can create wooden heart designs. They make ideal gifts from children for grandparents or their teacher – just check out these.
How do I get started? Hopefully you’re feeling excited to make huge Christmas savings!
If you’ve never tried Pebble Art before why not check out my paperback book that explains in just 10 easy steps everything you need to know to make some of these personalised designs yourself! There is even a fully illustrated step-by-step guide on how you can make a special seasonal pebble picture. So, if you’re inspired but you’re not sure how to create some of the amazing design ideas in your head, inside the book you will find examples of personalised pebble art, as well as loads of unmissable tips and tricks, and SO MUCH MORE! Soon you’ll be making your own gifts that are totally unique and everyone will love! Ps, if your not the creative type, this would be a great gift idea for your creative friend to add to her skill set and you can always borrow it after! Get the book here.
I trust you have read my previous blog on my early childhood experience with art. If you haven’t you can find it here.
I want to continue with my journey, starting in high school. Whoever says school days were the best days of their life… what a load of poop. Well, maybe they were the popular kids in school, but I certainly wasn’t. The only time I was popular in school was if it was group project time in art class. 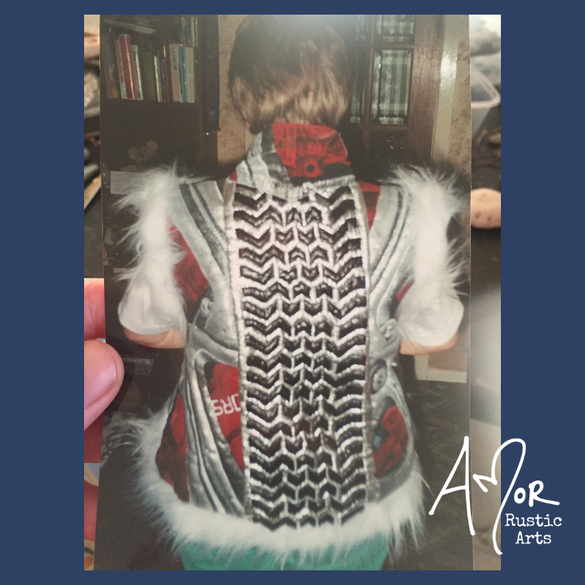
I found a photo of an art project from my school days. I made a waist coat all about painted car wheels onto denim and all the tyre treads were hand stitched. I remember staying up late till 3 in the morning hand stitching it, I was in a happy place, it didn't seem like any effort.
I survived because of art classes!
My art teacher was the best – quirky and someone I could get on with. Her clothes were bright and her jewellery eccentric. Every time she walked past she would make a peculiar noise – the clanging of her jewellery, the swooshing whip of her long suede skirt, or the clip clop of her pointy toe boots. The other classes were dull in comparison – rules suffocating the classrooms and hallways. Weekly, or even daily, I was asked to wash off makeup, told to stop colouring my hair in with different felt tip colours, take my earrings out, or was escorted to the toilets to be watched while I washed off my tattoos I had impressively drawn on myself and whoever sat beside me (this is when I learnt all about permanent markers lol) or was made to sit at the front for not paying attention and doodling on whatever file sat in front of me. I was a drifter. Imagining and creating a life inside my head, while some teacher talked for 35 minutes, it was my coping mechanism. I was smart in the sense that my grades were good - to this day I still don’t know how I got an A in my GSCE French - but really, I was just good at holding information for test day and by the next day it was gone; I didn’t have a clue! I remember one turning moment in my school life that made me totally shut down. In English class in third year we were asked to write the most imaginative story we could think of. Well, I took him at his word and got excited to put my imagination and personality to good use for a class other than art. I went into English proud of my story and handed it over. Days passed and when the teacher handed our papers back he kept mine and he read it – to our whole class. It was wild, vibrant and imaginative compared to what my friends had written. I felt proud until he started picking holes in my creativeness, laughing and twisting his face in disgust at what my brain had told me to write. He got the class laughing at me too, until the point where he looked at me and told me it was a load of C.R.A.P, tore it up in front of my face, and walked to the front and put it in the bin. That was the day my confidence died. I have spent every day since rebuilding it and protecting it. 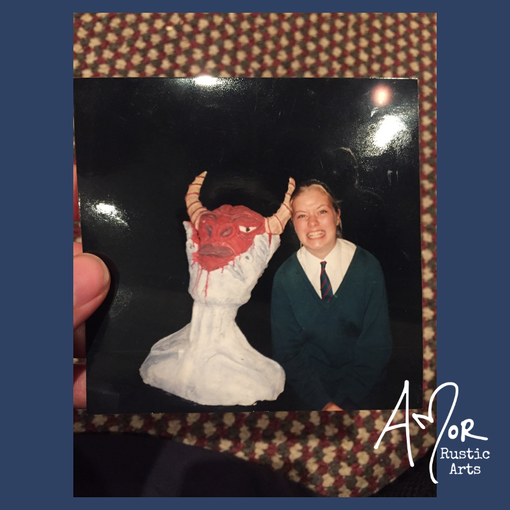
Enjoying the freedom of random art gallery trips in school
Art class was different. I felt encouraged and safe, surrounded by people with similar creativity. We could experiment with whatever we could dream of – or manage to carry into school! We got loads of class trips to museums and galleries, we could work with the radio on, we could go back and forth between our class and the other art class (with the cute looking older boy) and chat, so long as the work was done. I was in the generation that thought you needed to go to university to get a job. So, off I went to art college to the disgust and laughter of certain people who thought It wasn’t going to get me a real job and university students just get high all the time. Well, I soon learnt that one of those statements was true!
My first few years were good although I didn’t mix with many students because I wasn’t really into the party and drinking scene. I learnt what days my teacher showed up and how to get his advice on my work while holding my breath, so I didn’t have to smell the mixture of alcohol and cigarettes. The rest of the time I worked from home. My final year was a different story; my teacher changed. That final year was like holding onto a cliff by your finger nails. Every time I went in I braced myself for another mental confidence attack. I worked so hard to please that man, but never could. The student who was always high and knocked out 6 pieces in 30 minutes, the half hour before the teacher came around, was the reference I was to look to and be like. Every week, at my review, he would literally tell me it was rubbish and he didn’t know what I was doing here, in varying degrees of hostility. The month before my final show he told me I was going to fail. Two weeks from the final show he told me he didn’t have any more suggestions for me, there was nothing more he could do, and to just do whatever I wanted. So, I did. I didn’t turn up until evening on the designated day to hang stuff on the wall in preparation for the examiner’s visit the following day. I kept everything hidden so there wouldn’t be any conflict because now it was too late. And you know what? I passed and with flying colours. So much so that I won the award of 'graduate of the year', got given a nice healthy cheque, my work was on TV (it went on an exhibition around Ireland too) and my work even made it onto calendars with previous years’ winners. When the final exhibition was open to the public, I had no idea that people and businesses would want to meet me, let alone write me numerous cheques for 400 quid without batting an eye lid. Inside I was still feeling the no-good useless person I had been told I was. When I was getting all this attention my teacher came around in his loud gaudy voice, taking over the conversation, telling them how hard I’d worked and that I listened well to his concerns about my previous work to create such a good final show. At this point I just wanted to kick him in the balls! (sorry, not sorry lol) When the wine and cheese had disappeared, and the day had come to clear my exhibition space, his last words to me were, ‘’if you haven’t made it in 10 years you never will’’. That was the last punch in the gut I took – I never got a well done. For the next nine years I never lifted a paint brush. My creativity had been bashed so hard the thought of it almost made me vomit. But on the ninth year a fire was lit under my feet. I had a lovely little daughter who looked at me with such admiration that I knew I had to be the influence in her life that would fill her bucket with so much confidence, that if everyone bored holes in it, she would still have enough confidence to rise above them. On year nine I started AMor Rustic Arts and have never looked back. I am now an author and have my own art business! Who would have thought? Certainly not those two men. The point of this story is... Please don’t listen to your critics. Don’t let them take your power. It is mathematically impossible to please everyone; I’ve tried and am now a recovering people pleaser. I understand that it’s hard. Our brains are wired to focus on the bad – that’s what kept us alive back in the day - looking for venomous snakes instead of looking at the pretty patterns on the butterflies, but it no longer serves us. Your critics’ words will fade. You won’t. Stay dreaming. Don’t let the opinions of others get in the way of your dreams. If you can’t tolerate critics, then don't do anything new or interesting! I told you this one was going to be juicy. Bet you didn’t expect to read all that?! The final part in this intro, to how I began my business, is funny. I had no clue what I was doing and it will definitely give you a giggle. So, if you want to get the next part in your inbox just sign up here _____and I will keep you entertained!
So many of you sweet followers have emailed asking me was I arty as a kid, how I got into pebble art and how to start a business of your own. I hope this 3-part blog post will be an encouragement to anyone who isn’t sure “what they want to do when they grow up”.
|